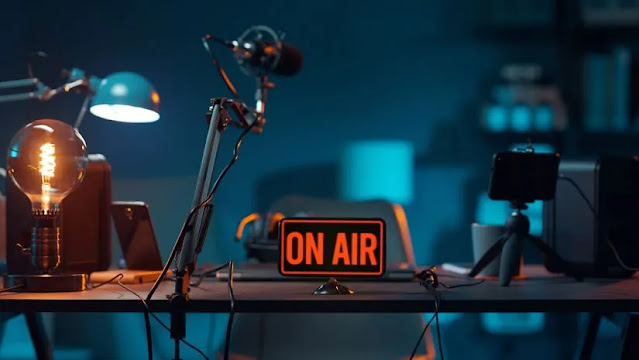
ESSENTIAL EQUIPMENTS REQUIREMENT FOR A VIDEO PODCAST TO SUCCED
1.CAMERA
The truth is, you can get away
with just your smartphone or webcam. But since you’re likely to upload your
video on YouTube and other popular video streaming platforms like Facebook,twitter
and Rumble you’ll want to make it look as good as most of the videos on there
in terms of quality. The best cameras for podcasting are pretty much the same
as the ones used for vlogging. However, you can use any type of camera that can
record 1080p videos.
There are different types of
cameras you can use for video podcasting, such as:
Smartphone: This is the easiest
and most affordable option if you already own a smartphone with decent video
recording capabilities. You can use your smartphone as a camera by mounting it
on a tripod or a stand and connecting it to your microphone or audio recorder
via a cable or a wireless system. Some smartphones also have built-in features
that can enhance your video quality, such as stabilization, autofocus, or HDR.
Webcam: This is another easy and
affordable option if you already own a computer with a built-in webcam or an
external webcam. You can use your webcam as a camera by plugging it into your
computer via a USB port and connecting it to your microphone or audio recorder
via a cable or a wireless system. Some webcams also have built-in features that
can enhance your video quality, such as HD resolution, autofocus, or low-light
correction.
DSLR, mirrorless, or
point-and-shoot camera: These are more advanced and expensive options that
offer superior video quality and more control over your video settings. You can
use these cameras as a camera by mounting them on a tripod or a stand and connecting
them to your microphone or audio recorder via a cable or a wireless system.
Some cameras also have built-in features that can enhance your video quality,
such as 4K resolution, optical zoom, or face detection.
The best camera for you depends
on your budget, your recording space, and your personal preference. You may
want to test out different cameras before you buy one, or read reviews and
watch samples online.
2.AUDIO INTERFACE
In case you’re using an XLR
microphone, know that you cannot directly plug it into your computer. You’ll
need a good audio interface, which will serve as your middleman and convert the
analog audio signals coming from your microphone into digital signals that your
computer can comprehend.
But that’s not its only purpose.
You’ll want your audio to pass through an audio interface, which is equipped
with a better processor that will effectively preserve sound quality.
Some of the best digital audio
recorders also have a built-in interface. This would make it possible for you
to save your audio files into a memory card.
3.MICROPHONE
The most important piece of
equipment you need for a video podcast is a good microphone. A microphone is
what captures your voice and delivers it to your listeners, so you want to make
sure it’s clear, crisp, and consistent. A poor-quality microphone can ruin your
podcast by making you sound muffled, distorted, or noisy.
There are different types of
microphones you can use for video podcasting, such as:
USB microphones: These are
plug-and-play microphones that connect directly to your computer via a USB
port. They are easy to use and affordable, but they may not offer the best
sound quality or flexibility. Some popular USB microphones for podcasting are
the Blue Yeti, the Rode NT-USB, and the Samson Q2U.
XLR microphones: These are
professional-grade microphones that connect to an audio interface or a mixer
via an XLR cable. They offer better sound quality and more control over your
audio settings, but they are more expensive and require additional equipment.
Some popular XLR microphones for podcasting are the Shure SM7B, the Rode
PodMic, and the Audio-Technica AT2020.
The best microphone for you
depends on your budget, your recording environment, and your personal
preference. You may want to test out different microphones before you buy one,
or read reviews and listen to samples online.
4.COMPUTER
After recording, the next piece
of gear that you will be spending the rest of your time on is your computer.
This is where the magic happens—from file import and audio/video editing to
finally uploading your media online.
We suggest that you upload two
versions: the audio, for targeting listeners on the most popular podcasting
platforms, and the audio-video, which you’ll likely upload on YouTube and
Facebook.
5.HEADPHONES
A reliable pair of headphones
allows you to monitor your audio in real-time. This ensures there are no
unexpected noises or interruptions, and that your voice levels are consistent
throughout your recording.
6.LIGHTING
The most important part of any
video content creation process is the lighting. It’s great to have a place that
is reliable for filming all kinds of shots and lighting is essential here.
The GVM 100 watt light kit with
the lantern softbox provides a great source of light and is very balanced too.
Having two of these really fills in the shadows and faces and is flattering.
One thing podcasters learned about lighting is that you want to get it as big
as possible but as soft as possible and these kinds of lights do that. These
are what you would call COB lights, they are not panel lights or anything like
that.
You can also have a LED panel
light by GVM, which is providing hair light to the subject, essentially making
it look like the accent lights are projecting a light behind them. It creates
some sort of separation from your background. So think about adding a hair
light in addition to accent lighting in your setup. which can level it up
altogether.
There’s no point in doing a
recorded video podcast if nobody can see you. Try to avoid sitting with your
back to a window — facing one is good, though. If you don’t want to or can’t
buy lights, just put your camera between you and a window. To replace or
enhance natural light, grab a couple of lamps and position them where they
light your face.
7.STUDIO SPACE
The quietest room you have in
your home will be fine. Since you’re on video, clean your room before you get
recording. If you’re really worried about background distractions, consider
purchasing a simple room divider or try a green screen.
For a video podcast, the
recording space you choose can make a significant difference in the final
product. Here’s what you need to consider to ensure you get the best possible
results:
First and foremost, you need a
quiet space. Any background noises—be it from traffic, air conditioning, or
people talking—can distract from your content. Choose a location where you can
control these noises or soundproof your space.
A room that’s too big can echo,
while a tiny space can feel cramped on camera. Pick a room where you can
comfortably set up your equipment and move around. It doesn’t have to be
massive, but it should allow for a table or chairs, lighting, and camera setup
without feeling too tight.
Natural light is great, but you
can’t always rely on it due to weather changes and the time of day. Invest in
some good quality lighting equipment. Softboxes or LED panels can help provide
even lighting, making you look more professional.
Consider what’s behind you. A
messy or busy background can distract viewers. Some people opt for a plain
colored backdrop or a green screen, while others curate a space with props or
bookshelves. The key is ensuring it looks intentional and adds to your brand or
podcast theme.
Soft materials absorb sound,
reducing echoes. If your recording space has a lot of hard surfaces, consider
adding rugs, wall hangings, or even specialized acoustic panels to improve
sound quality.
Think about where your camera
will be. It should be at eye level and capture a flattering angle. Remember,
the viewer’s perspective will be shaped by this angle, so experiment to find
what looks best for you.
If you’re going to be sitting,
ensure your chair doesn’t squeak or wobble. A podcast table might be useful for
placing notes, laptops, or props. Just ensure it doesn’t reflect light or make
noises.
Being under lights for a long
time can get warm. Ensure your space is well-ventilated, but watch out for
noises from fans or open windows. Air conditioning helps a lot here, especially
if you’re surrounded by a lot of podcast equipment.
Have a dedicated space or storage
solution for your mics, headphones, and other gear. This helps in keeping the
space tidy and ensuring you have everything at arm’s reach.
This space should be somewhere
you feel comfortable and confident. If you’re uneasy, it will show on camera.
Personalize it with items that inspire and motivate you.
8.VIDEO RECORDING/EDITING
SOFTWARE
This is where your audio and
video gets captured. Software like Audacity, Adobe Audition, QuickTime,Streamyard
or Squadcas can be crucial in recording and editing your podcast to achieve a
polished finish.
Post-production is where the
magic happens. Software like Hindenburg, Audacity, Descript, or Pro Tools
allows you to cut, trim, add effects, and generally enhance your video and
audio to be the best it can be.
9.OTHER PODCAST ACCESSORIES REQUIREMENTS
The other equipments you need for
a video podcast is accessories. Accessories are the extra items that can
enhance your video podcasting experience and make it easier and more enjoyable
for you and your viewers.
Some accessories you may want to
consider are:
Tripod or stand: This is an item
that holds your camera or smartphone in place and allows you to adjust the
height, angle, and orientation of your shot. It can help you achieve a stable,
steady, and professional-looking video.
Pop filter: This is an item that
attaches to your microphone and reduces the popping sounds that occur when you
pronounce certain letters or words. It can help you achieve a clearer and
smoother audio.
Shock mount: This is an item that
attaches to your microphone and isolates it from vibrations that may cause
unwanted noises in your audio. It can help you achieve a cleaner and quieter
audio.
Windscreen: This is an item that
covers your microphone and reduces the wind noise that may occur when you
record outdoors or near a fan or an air conditioner. It can help you achieve a
clearer and smoother audio.
Remote control: This is an item
that allows you to control your camera or smartphone remotely and start or stop
your recording without touching your device. It can help you avoid shaking or
moving your camera or smartphone and make your recording process more
convenient.
Teleprompter: This is an item
that displays your script or notes on a screen in front of your camera or
smartphone and allows you to read them while looking directly at the lens. It
can help you deliver your message more confidently and naturally.
These are some of the accessories
that can improve your video podcasting quality and efficiency, but they are not
essential. You can choose to use them or not depending on your budget, your
needs, and your preferences.


Comments